Home About Erin Featured Blog Roll Advertise
Showing posts with label how to's. Show all posts

Saturday, September 28, 2013

Hover "PIN IT" Button

 
Thank you to one of my readers for suggesting I get the hovering "Pin It" button on my pictures.  I admit that I am a computer idiot.  So, I was a little nervous to try and figure this out on my own.  But, that is the beauty of the Internet!  I just typed in "How to install a pin button on a blog" and tons of tutorials came up!  I used this helpful tutorial from Code it Pretty.  It was super easy!
 
My "Pin It" button is in the top left corner of all my pictures now.  How cool is that!?
Happy Pinning!!


Tuesday, February 22, 2011

Framing Out a Mirror and Quarter Round

I thought I would share with you some of the projects we did in the master bathroom redo.

******************************

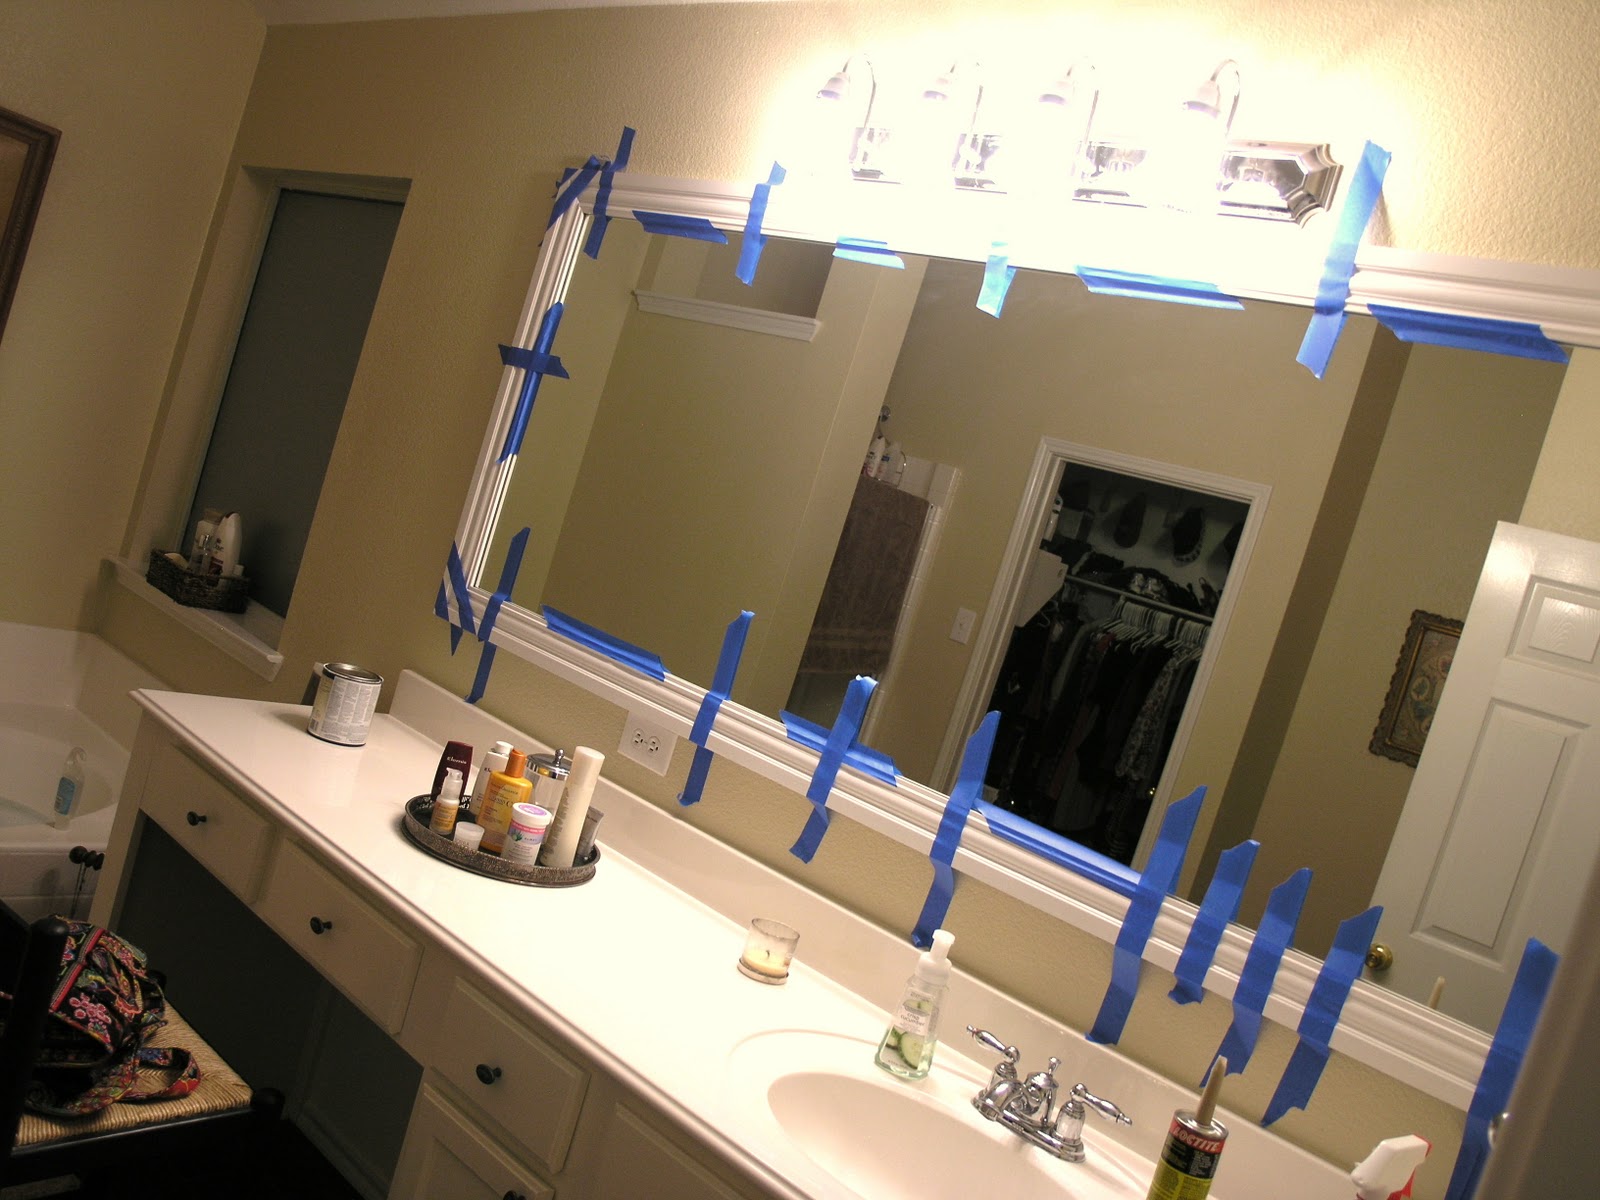
This project was completely my husband's idea.  He thought the mirror would look great framed out in wood.  Secretly, I have always wanted to do that, but I knew he would have to move the light fixture over the vanity a little higher, so I didn't want to bother him with that little request since he was already working so hard. However, he offered and I accepted on this one!


It really was quite easy.  There are so many tutorials floating around out there, but none answered our question of that pesky outlet you see at the bottom of the mirror.


The trim is literally sitting right on top of the outlet. I mean we made it by the hair of our chinny chin chin.  Pesky issue one ~ check
He used a miter saw to cut the edges and then I painted a glossy white on.  Putting it up, was actually quite comical.  We used liquid nails to secure the entire thing.  That's it!  So, I had to hold one side while he held the other and then we started to tape our sides at the same time.  The part that was comical was, my side would slide down because I wasn't holding it right.  We would start the process over again and again!  But, we finally got it up and secured and let it cure over night.


I'm very pleased with how it turned out!


The next project was laying quarter round down around the bath tub, shower and at the base of the cabinets.  The grout didn't lay to pretty there, so we needed something  to make it look nice and clean.


Enter, pre-painted quarter round.  We got it at our local Lowe's and the best thing is, it's not wood.  So it can get wet and not rot.  We applied liquid nails and laid it snugly against the tub and tile and anywhere else we needed it.


We secured it with painters tape so it wouldn't move.


While my man, was at work, I got busy painting the cabinets.  I'm kinda a semi pro at this by now, so it went really smoothly.  I used the same paint from the Kitchen cabinets so I was trying to save us some money again.  I didn't have very many doors to do this time, so I thought I would try my hand at placing paintable bead board in the center of the cabinet door.


David made me a template and then I just cut away.  I was really nervous about how it would turn out and how easy was it going to go on, and guess what?  It was so much easier than I ever thought. 

*I used an exacto knife to make my cut and then finished the cut with scissors.
*You place the cut piece in a sink full of water for about 3 min. and let it soak really good
*Place the wet piece on the cabinet door and smooth out
*I used a flat edge scraper to get all the bubbles out
*And Voila!  You let it dry over night and there you have it!

***Don't look at those dirty dishes in the sink!  I had a project to do!***


Sorry I don't have a clearer picture.  But, I love them.  I painted right over them with my paint and they look great!  I still can't decide if I want to rub a glaze over them or not.  I'll have to live with them for a while.


Ah, the joys of painting!  I think I take up every room in the house when I paint.


Here's a look at the quarter round all done!


Looks nice doesn't it?


I'm still waiting on my curtains to be shipped for the cutout under the cabinets.  I just painted a shelf and now I need to glaze it and put it up and I'm done!!  I really am enjoying our new bathroom.  It just feels good to have it done and know that we did it!  Hope your projects are going well and have a good sleep!

Blessings,

Saturday, January 22, 2011

Valentines' Cupcake Liner Wreath

Here is a little Cupcake Liner Wreath Tutorial!  I wanted to do something for Valentine's coming up and saw this floating around somewhere in blog land and knew I could tackle that!  Love how it turned out!


Here is what you need:
Valentine's cupcake liners ( I used 3 different colors)
Scrapbooking flower stickers (Michaels)
small Styrofoam round wreath
Ribbon
Hot glue gun


1. Fold the liner in half


2. Fold again, and then fold the very tip (look at pic)


Here is another angle of  step 2


3. Put a dot of hot glue on the folded tip and start lining the wreath.  If you notice in the above picture, I line them up in random rows of 3.


4. To make the "flower" just take a liner and flatten out. I hot glued this directly to the wreath.  I tried to place it on top of the liners but it just never looked right.


Here is a close up of the "flower" I also folded a different color liner in half and place it directly under the flat liner.  I use 2 folded white liners to create a sort of border.


Then I took the scrapbooking flowers and placed them directly in the center of the "flower".


I took some polka dot red ribbon and used florist pins to attach it to the back of the wreath.  Then just used a command strip on the back of the door to secure it.


Voila!!  I placed all the white in one section, all the pink together, and then all the red.  You can only tell if you get right up on it.  But, I'm very happy with it.  I think it is sweet!


I don't have much Valentine's decor, but I love what I have.  Hope you enjoy these few pictures!


Do you see that ratty kitty kat doll holding the heart?  She is 20 years old and was my very FIRST Valentine's gift from my Man!  I've kept her all these years and I always set her out.  He brought me that and a box of chocolates.  He was so cute!  Aw, to be 16 and just falling in love again.  I love that memory, but I love right now too!


I got this little LOVE glittered sign in the $1 section of Michael's last year.  Score!


I love the colors and the painted flower on this vintage chocolate box. 


 Old cards and postcards are little works of art to me.  This is one of my favorite Valentine cards I found.  It is from 1942!


So, there you have it!  Hope you go out and make you a Cupcake Wreath, because it was super duper easy!  Have a great weekend!

I am linking up here

Somewhat Simple
Between Naps on the Porch
Coastal Charm
My Uncommom Slice of Suburbia
Savvy Southern Style

Friday, November 12, 2010

Reviving and Old Frame

I've always loved this picture, but hated the frame!  Just a boring wood frame.  No detail and not even a pretty color wood.  So I decided to paint it!  Change the look, just like that!  Easy peasy!

I started by wiping down the frame with warm soapy water  The dust was a little embarrassing!
Then, I just taped off my edges with blue painters tape.


I grabbed a can of paint from my stash.  I used the same color on my island.  Homestead Resort Olive.  I know!  Really weird and long name.  Right?  I used a cheap foam brush from Wal-Mart.


Voila!!!  Done!  Quick, easy and cheap!


Do you have a frame or something that needs some life back into it?  Paint always does the trick!  So get busy!  Hope everyone has a fabulous weekend!

I am linking here

Savvy Southern Style

Thursday, November 4, 2010

Painting drawer pulls


Before I painted the cabinets, my drawer pulls were a satin nickel finish.  I found them at Pottery Barn.  The bin pulls were a fabulous price and I couldn't resist them.  I got the knobs at a discount center for super cheap and they work well with the bin pulls.


Drawer pulls are serious jewelry for your cabinets!  Without them, my cabinets were pretty much lifeless.  When I painted the cabinets the creamy white, I really thought the pulls needed to be darker, and coordinate with the appliances.  But, I really didn't want to buy new hardware!!  My man, would not have liked that!  So I did the next best thing!!  Enter, paint!


Spray paint, to be exact!  Rust-oleum has the best collection of colors to choose from.  Here's how I did it.
  1. I took all hardware off the doors, cleaned them in hot soapy water and laid them down on paper in the garage.
  2. I used the Rust-oleum primer and gave them all one coat.
  3. Then I took the metallic spray paint and did two coats.

I flipped the bin pull down instead of up this time.  We constantly had crumbs in the handle, and I couldn't get to it to clean them out!  Gross!!!  This way, my bin pulls stay clean!  YAY!


I was pleasantly surprised at how easy all this was!  In no time at all, I had a completely new look!  The key is the primer.  DO NOT skip this step!!!  You will end up with chippy drawer pulls.  The paint just won't stick to the bare metal!  I tested that theory out on one knob.  So, if you've got pulls that need to be updated and you don't want to buy new ones, get busy!  Start painting!

Monday, November 1, 2010

Felt Flower Headband

Here is my easy tutorial for making felt flower headbands!  It is super easy and fun to make!


First, find some cute felt and cute out a circle.  You can cut any size you want.  The bigger the circle the bigger the flower.  Notice, my houndstooth felt is an oval.  That's o.k, it won't affect the flower at all.   It doesn't have to be perfect!

 Next, cut a spiral out of the circle.  When you get to the end of the spiral make sure you leave a small circle.  This will be hot glued down to the flower to hold everything in place.


Next, take the end of the spiral where you started your cut.  Then start rolling it up till you get to the end.  Make sure you start it out very tight.  When you get to the end, leave a small circle so you can glue that down to the back of the flower.   Can you see the flower in this picture?  That is what the back of the flower should look like.  Next, you will cut out a circle of black felt and glue it down to the back of the flower.


Here is the black felt glued down.


Next, take your headband and hot glue directly to the flower.  Make sure you position the flower exactly where it looks the best on your head. 


Then cut out another circle of black felt and glue directly on top of the flower and headband.  See above picture to see how it should look.


And there you have it!  A beautiful and quirky headband for you or your little girl!!


 Hope you love it as much as I do!  I can't wait to make more!  You can also add smaller flowers to the sides of the bigger flower to make it look fuller.  Have fun!


I will be linking up here